Production setup of nodejs
This guide provides a step-by-step walkthrough to configure, deploy, and run your Node.js application created using create-express-mongo-prod in a production environment.
✅ Prerequisites
- Ensure the following are installed on your system:
- Node.js ≥ 18.x
- Docker ≥ 20.x
- Docker Compose ≥ 2.x
- Git
- Any of the following:
- MongoDB / PostgreSQL (local or remote)
- AWS account/Supabase s3 (for S3) (if you want to use aws-s3)
- Redis (if selected)
- Kafka broker (if selected)
- BullMq (if selected)
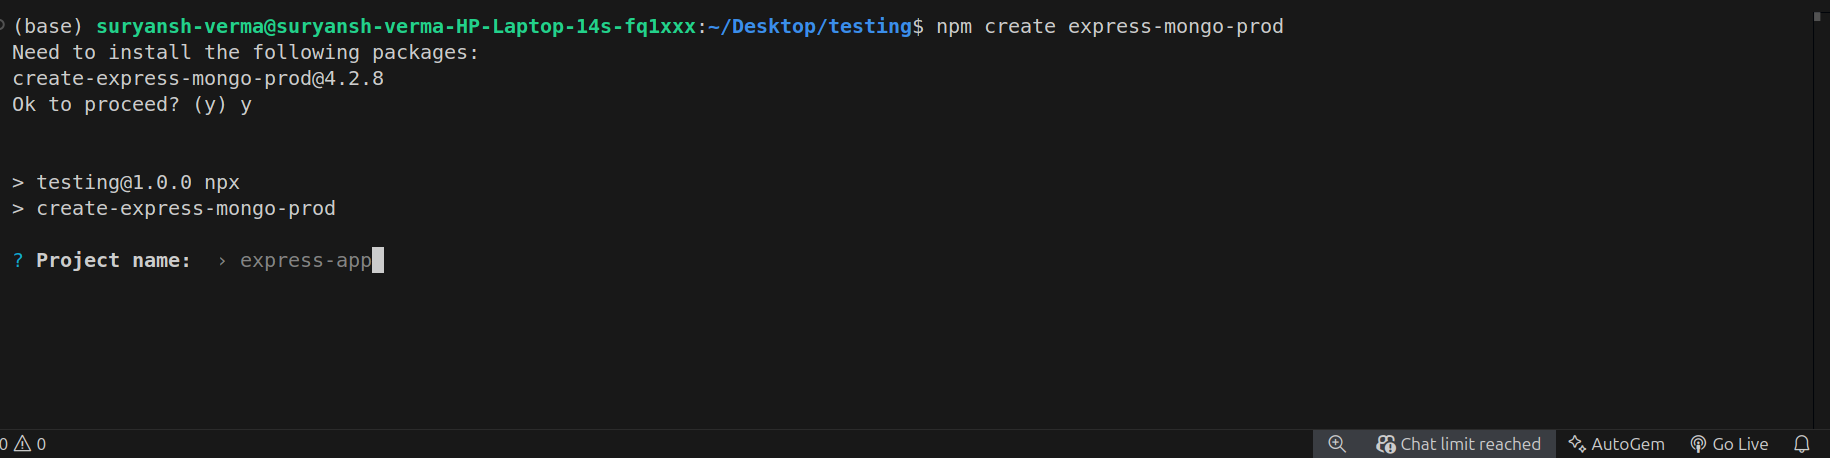
1️⃣ Create a New Project
npm create express-mongo-prod
or
pnpm create express-mongo-prod
or
yarn create express-mongo-prod
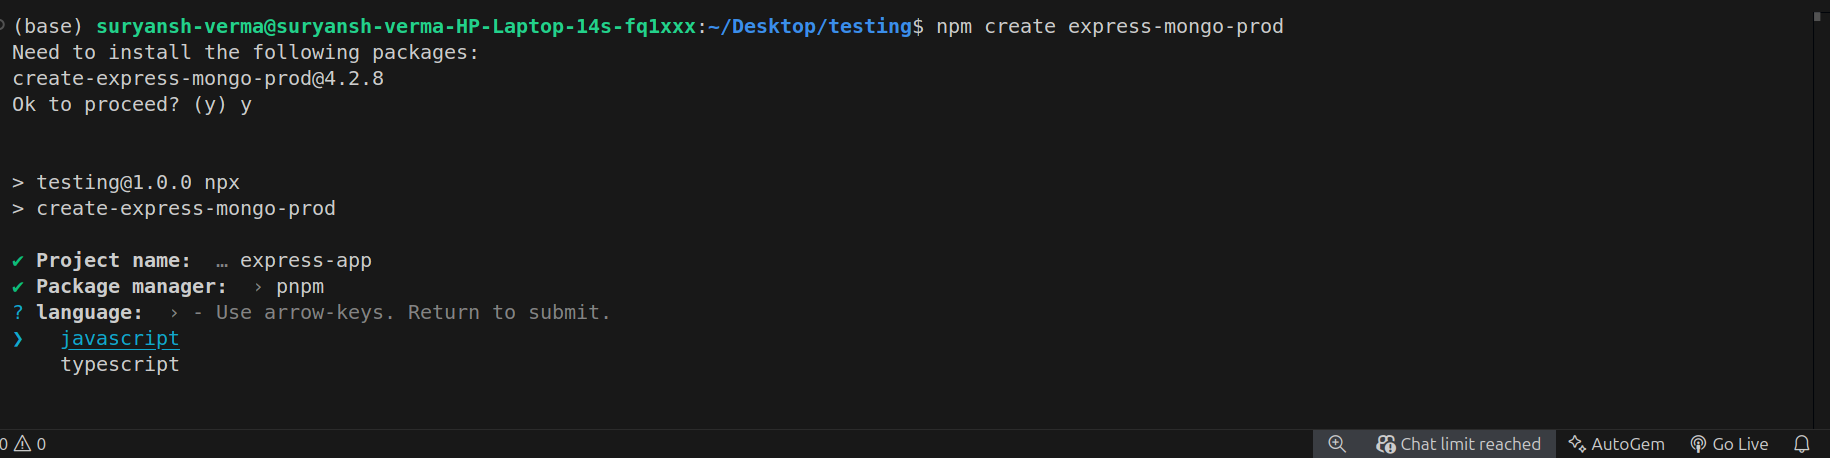
- Enter project name or default to express-app
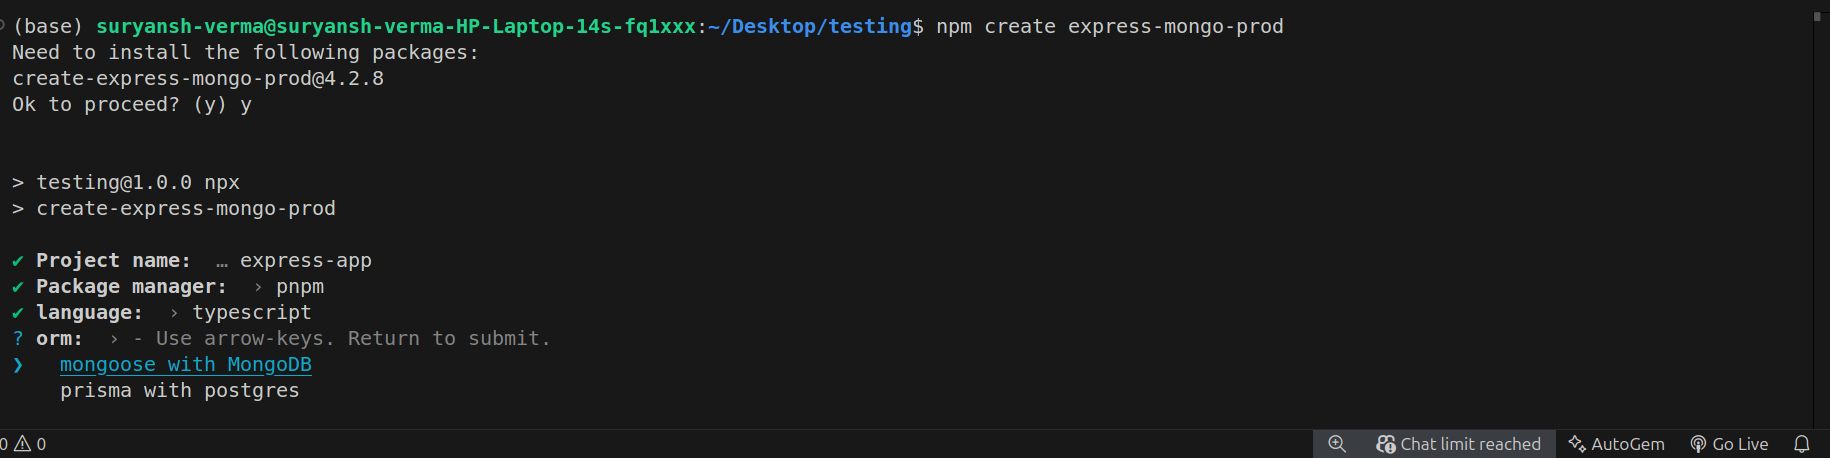
- Select package manager and language
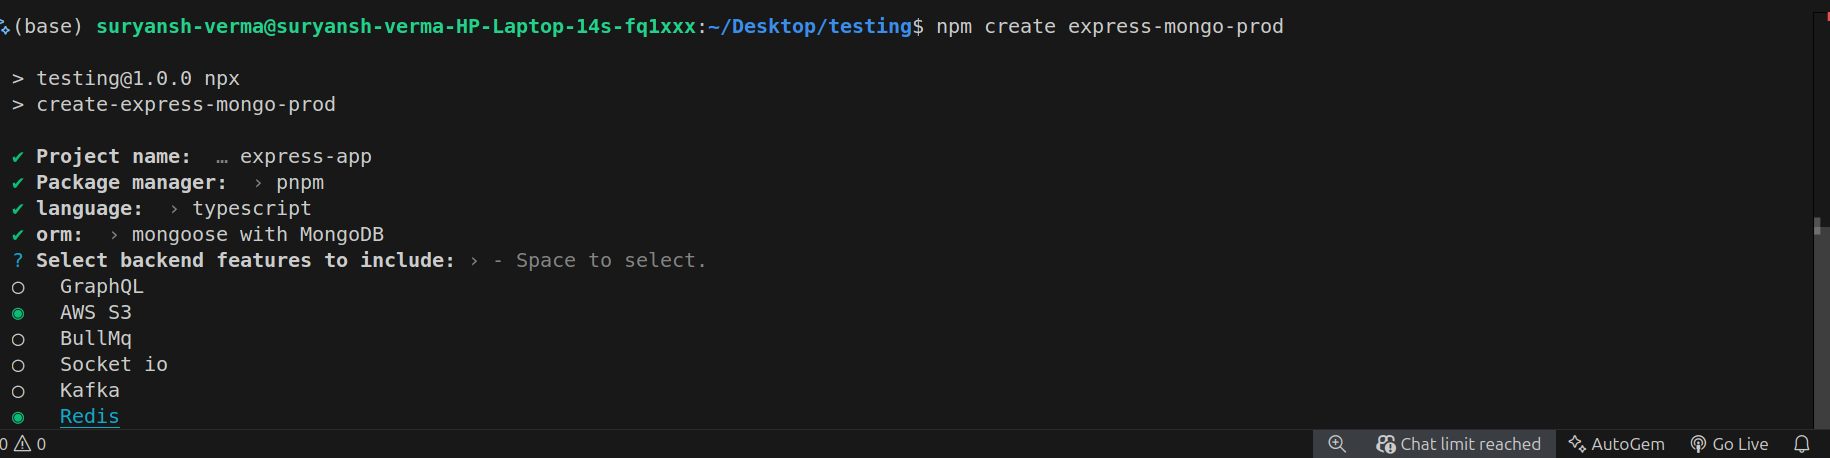
- Select ORM
- Select features by space button which you want to include in your project
📁 Folder Structure
This is the scalable and preferred folder structure for developers to work within a team.
express-app/
├── .dockerignore
├── .gitignore
├── .husky/
├── .github/
├── docker-compose.yml
├── Dockerfile
├── eslint.config.mjs
├── package.json
├── readme.md
├── tsconfig.json
├── src/
│   ├── config/
│   ├── controllers/
│   ├── middlewares/
│   ├── models/
│   ├── routes/
│   ├── s3/
│   ├── services/
│   ├── types/
│   ├── utils/
│   └── index.ts
📂 src
Main folder for our app. All source code will be there.
src/config: All config files will be there like mongoDB connection, prisma connection or all files.src/controllers: All controllers are will be written in this folder.src/models: If you are using mongoDB then this folder will be there and includes all mongoDB schema files.src/routes: App's all routes will be here.src/services: If you select services like kafka, bullMQ, Redis then this folder exist and all services will be there.src/utils: All utility files is here.src/index.js: Main file where server start.
📂 Other files and folders
Dockerfile: Dockerfile is used for dockerise you app. Dont do anything it will auto generate bydocker build -t myapp .docker-compose.yml: docker compose file for local development..github: Includes issue and pull request templates for github..husky: husky configuration..dockerignore: docker ignore file.gitignore: git ignore fileeslint.config.mjs: For lintingpackage.json: dependencies folder
🚙 Utilities
There are some utilities are there in this project so always use theese for better development
utils/response.js: Use this in place of res.json(). for better response.utils/asyncHandler.js: Use for async functions avoid using try catch block in apis.utils/error.js: AppError class is there. So use use this in your apis for error for ex.- In Javascript
export const createUser = asyncHandler(async (req, res) => {
    if(anyError) throw new AppError("message",400); // message,status
	response(res, 201, "user created", { user: "testing uer" });
});
- In Typescript
export const createUser = asyncHandler(async (req: Request, res: Response) => {
    if(anyError) throw new AppError("message",400); // message,status
	response(res, 201, "user created", { user: "testing uer" });
});
🪒 Snippets for VS-CODE
If you are using vs code then there are snippets in .vscode folder for different-defferent function.
controllers: For making controller when you will typeconthen autocompletes to full controller template.router: When you write route then it will autocomple to give routers template.- for javascript
/**
*
* @description route for creating user
* @route POST /api/user/signup
* @access Public
* @param {import("express").Request} req
* @param {import("express").Response} res
*/
export const createUser = asyncHandler(async (req, res) => {

});
- for typescript
/**
*
* @description route for creating user
* @route POST /api/user/signup
* @access Public
* @param req
* @param res
*/
export const createUser = asyncHandler(async (req:Request, res:Response) => {

});
🪪 Middlewares
In src/middleware already two useful middlewares with methods are defined.
auth.middleware.js: In this authMiddleware is defined which checks user token if not matched then not allowed to user if it is used in your api.
import { Router } from "express";
import { createUser } from "../controllers/user.controller.js";
import { auth } from "../middlewares/auth.middleware.js";
const userRouter = Router();
userRouter.post("/createAdmin",auth, createUser);
export default userRouter;
- In this
auth.middleware.jscreateToken and verifyToken method is there which you can use in auth or your custom logic.
// For creating token
const token=await createToken({userId:"temp"},60); // time in minutes
// for verifying token
const isVerified=await verifyToken(token); // returns true if token is correct
error.middleware.js: This middleware already is included in mainindex.jsfile. It handles all errors. for example.
export const createTodo = asyncHandler(async (req, res) => {
	const {todo="",completed=false}=req.body;
    if(!todo) throw new AppError("todo is missing",400); // this error will be cached by error middleware and will send error response with this message to user
    // db operation for saving todo
    response(res, 201, "todo created", { todo });
});